Interface Roles
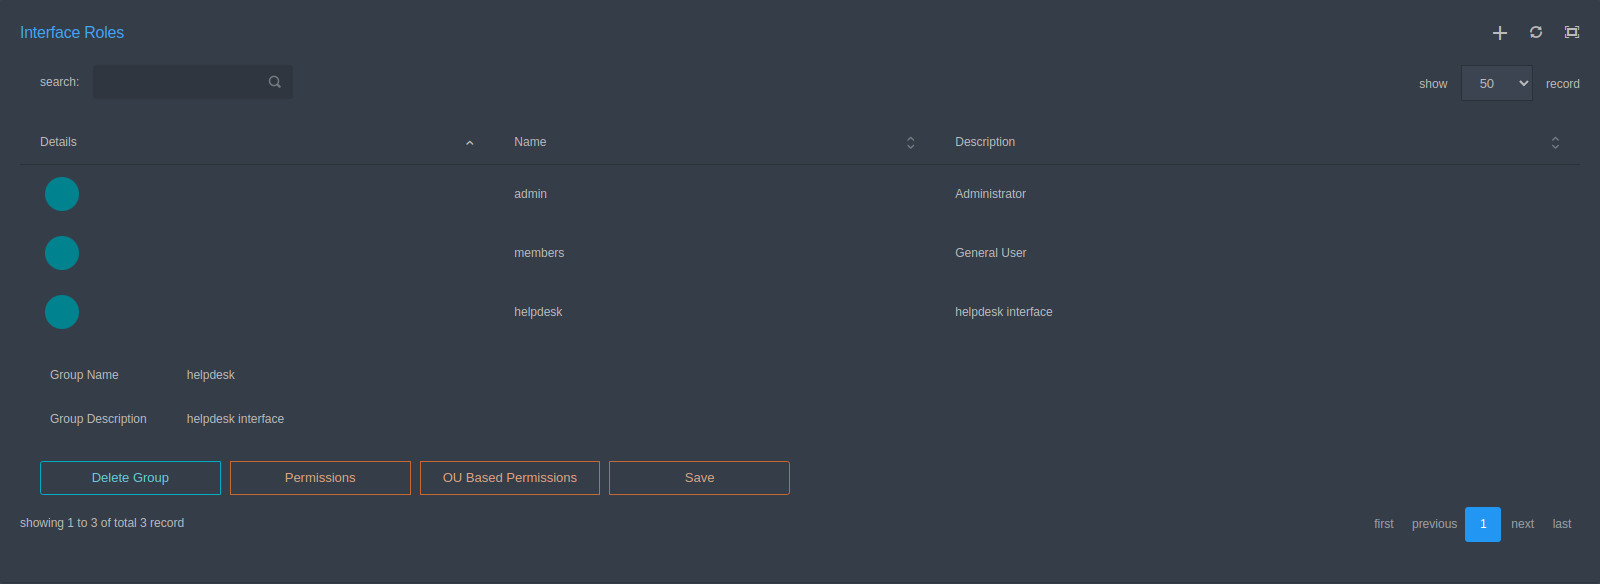
On the Interface Roles screen, the available roles are listed and the new role group can be defined.
SambaBox web interface usage is managed with role-based authorization and need-to-know principle.
With the privileges you give to the roles, you can restrict the work and operations of the users. On this screen, you can edit the permissions of the existing role groups or delete the role group.
Follow the steps below to create a new role group:
Press the [+] button to create a new role.
Write the name and description of the role group and click the [Add] button.

After creating the group, press the [Details] button.
Select the group you created on the screen that comes up.
Press the [Permissions] button.

You can also authorize the group on an OU basis. Press the [OU Based Permissions] button for this.

On this screen, select the OU that you have authorized to process the group you selected and press the add button.
No privilege has been given to this new group at the beginning.
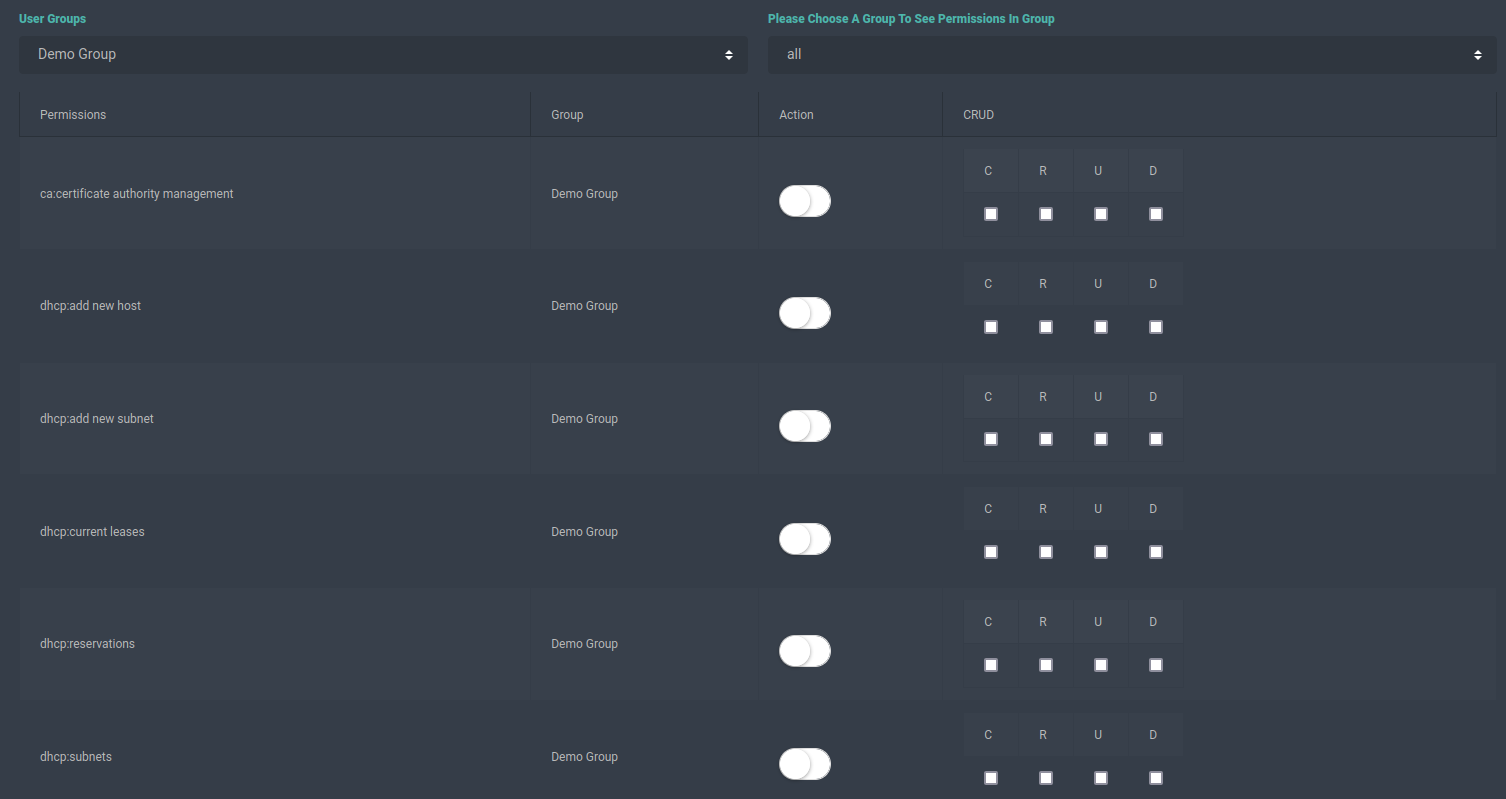
List the permissions in the group and select the section to authorize.
Activate the [Action] button for each transaction in the section you will authorize.
Mark the authorization types in the jurisdictions.
The C (Create), R (Read), U (Update), D (Delete) tiles manage the create, read, update and delete functions on the respective pages. Check the box “C” for the authorization to create a new record, “R” for the read authorization of the relevant screen, “U” for the record update authorization, and “D” for the record deletion authorization.
Press the [Save] button.
Hint
When the directory:user-ou-group-computer management permission is given, the directory:tree permission must also be given.
When dns:add_zone permission is given, dns:zones permission must also be given.
When dhcp:add_new_subnet permission is given, dhcp:subnets permission must also be given.